Personalization - setting up placeholder text in your promotions
Learn how to display first names or other custom data on your promotion's text
People love to see their names or just know that a promotion is personalized to them, that's why Personalization tokens (placeholders/shortcodes) are so powerful. In BeeLiked, each entry field option can be turned into a placeholder to display variable text or even images to entrants.
Default Placeholders
We've set up common data fields for you already. So if you're editing a promotion and you click on the Enter page of your promotion and then click the form to edit, you'll see a pop-up with the form options:
Enter Page > Edit Form > Data Collection

By default, the following fields are set:
- First Name
- Last Name
Each of these already has its own Placeholder that can be added to text on your promotion:
For example, if you want the person's first name to appear, then in the text area for your promotion you can add the field:
When a first name is known, it will display in place of this.
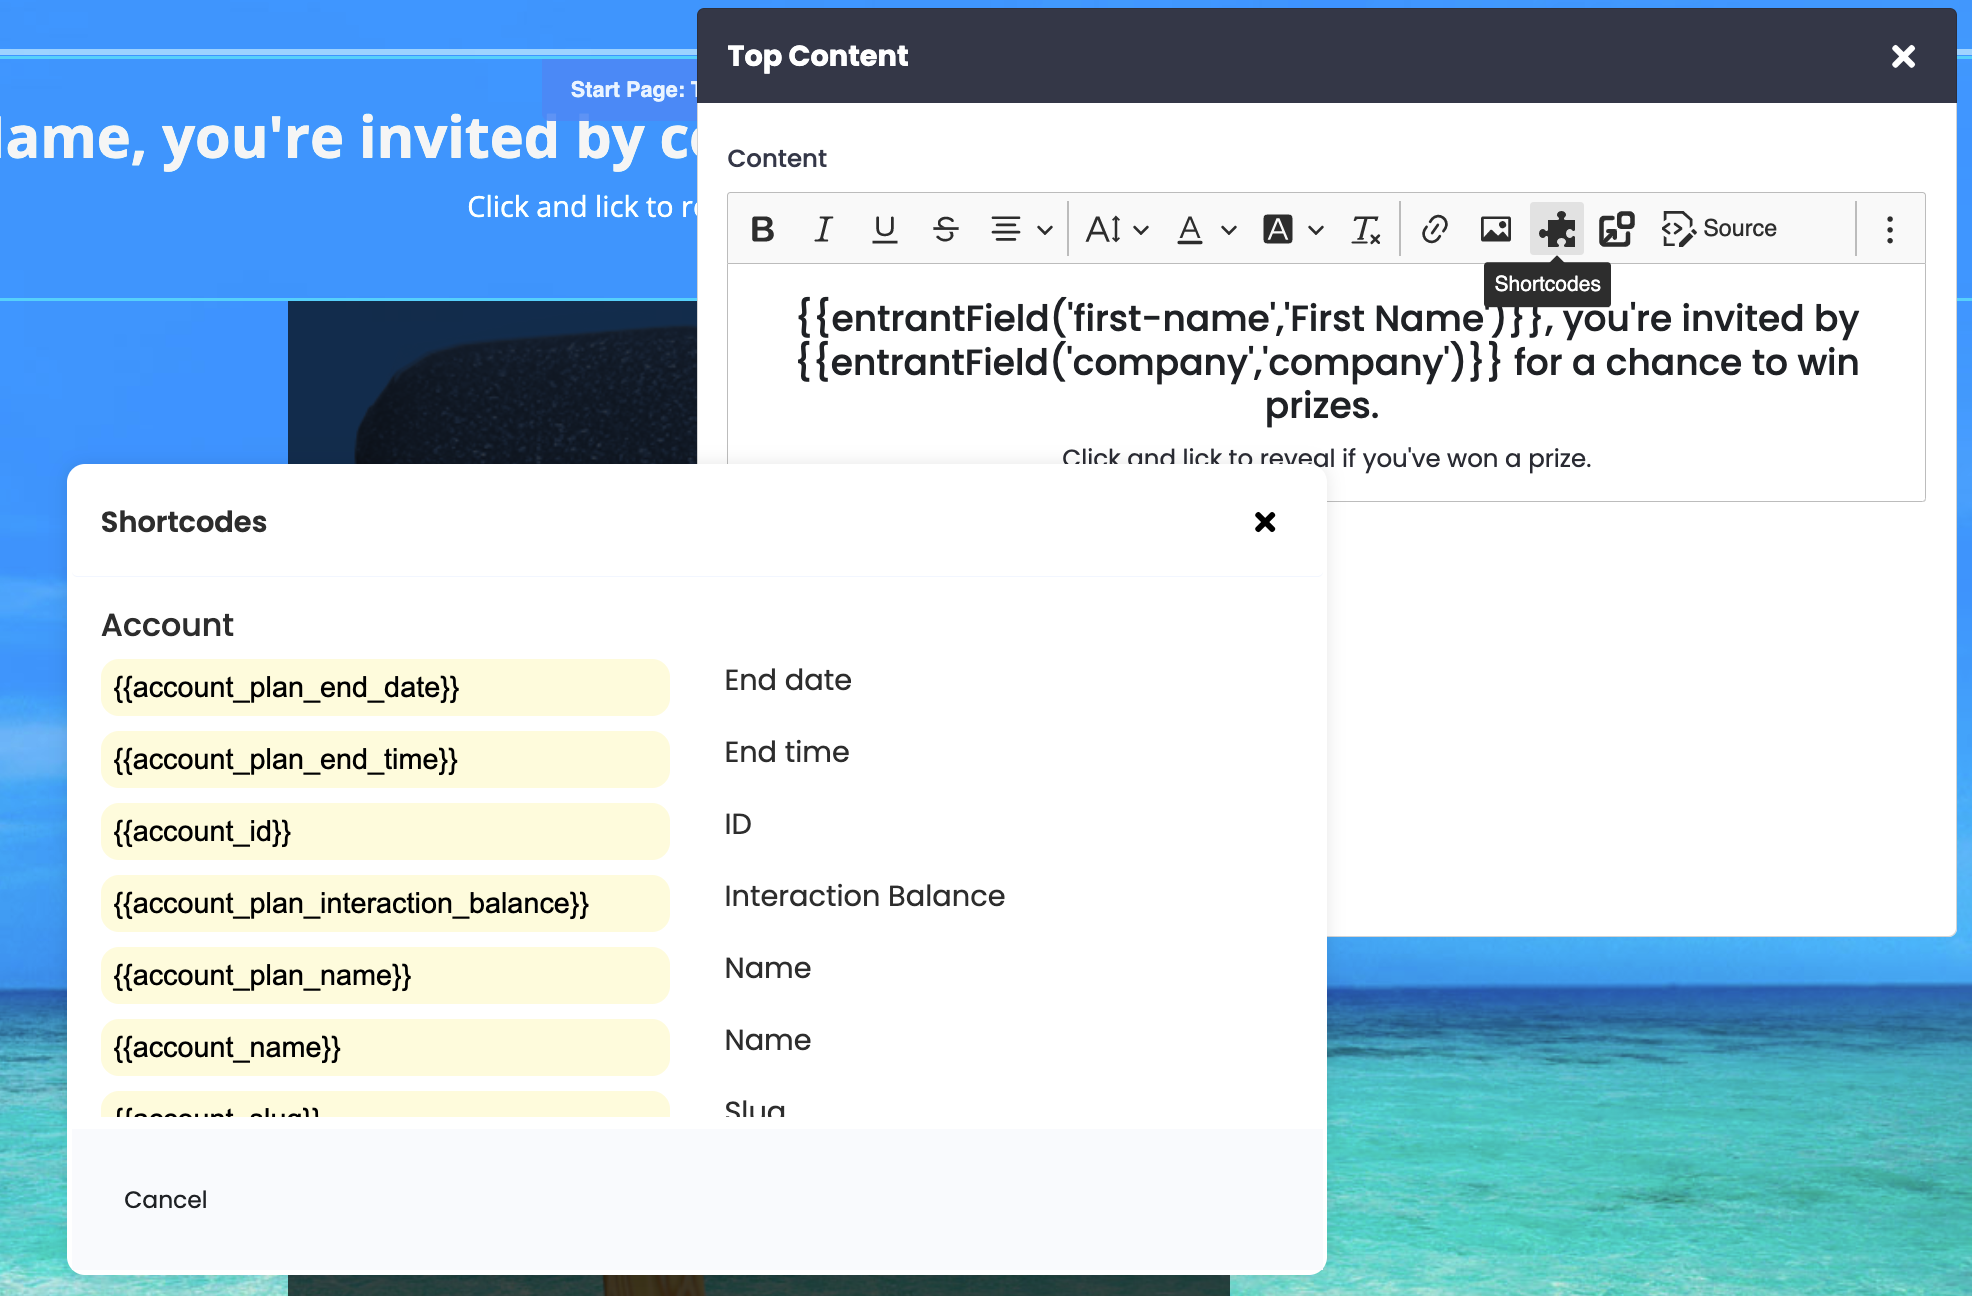
Here's how this looks in the editor (you can also see the icon to click to show available placeholders/shortcodes)

Here's how you can add your own placeholders
As you can see in the image above, we've added a placeholder field for 'Company' so that the name of the company that the entrant works at can be displayed. To this, you must first add a new Text Field to an Entry Form (it doesn't matter which promotion or whether you choose to display this in a form, it just needs to be created).
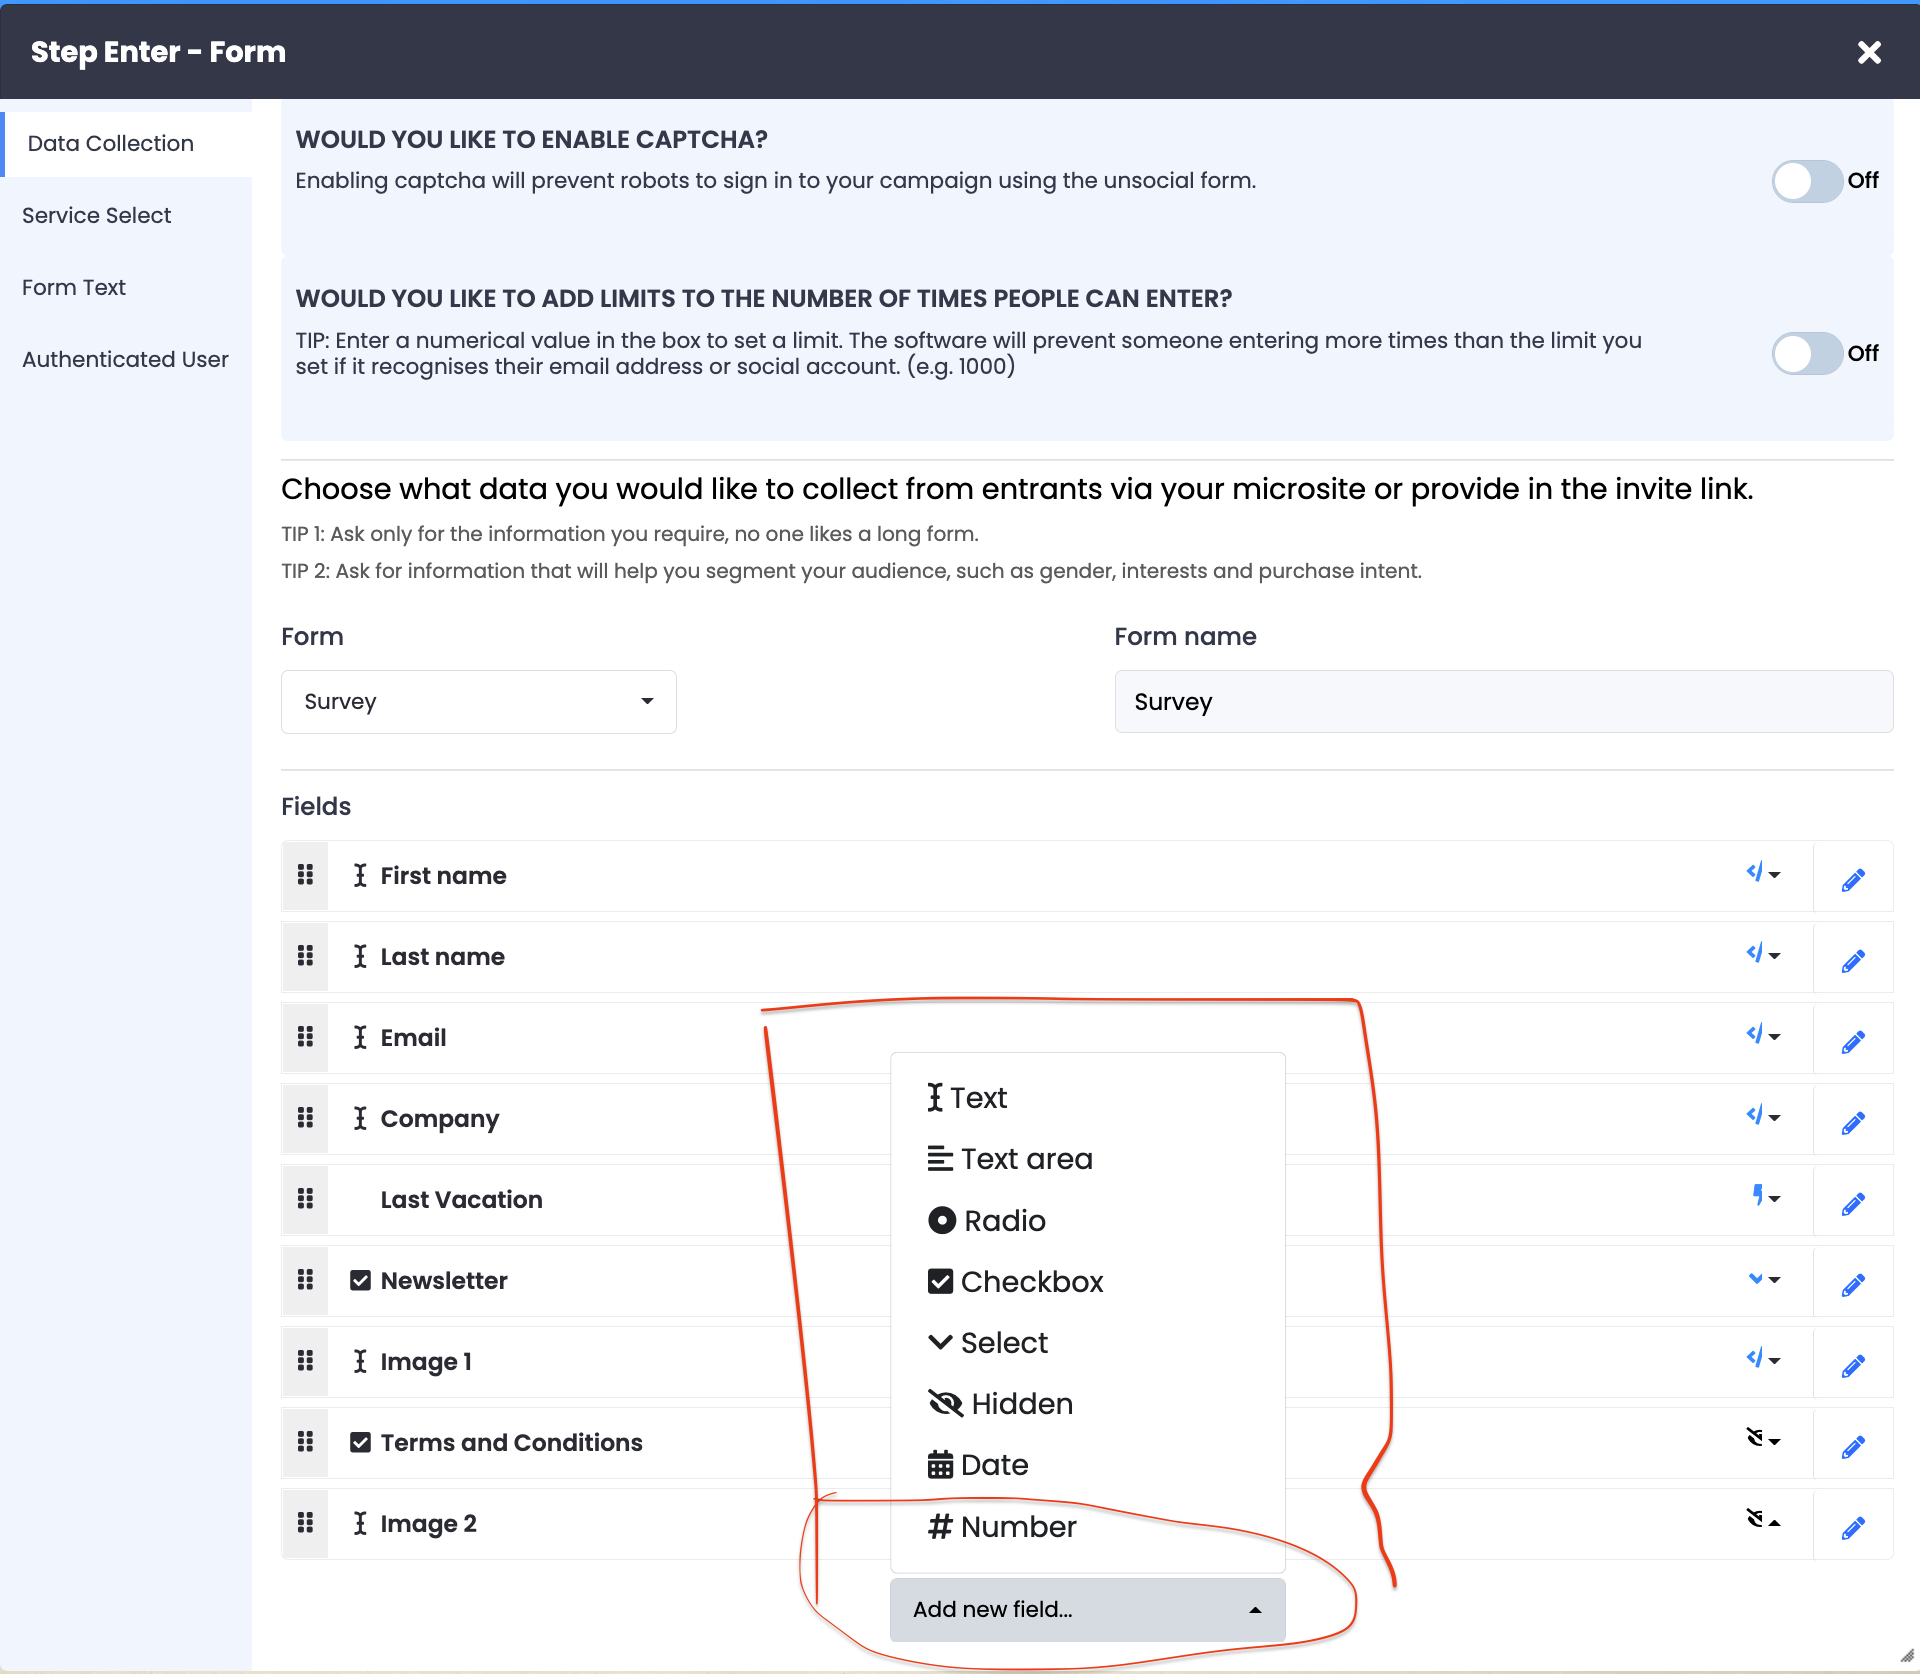
To create a new form field, go to the entry page of one of your promotions. Click to edit the form. Click the 'Add new field' option to open the pop-up. If you wanted to add a field for Company, you would add a 'Text' field.

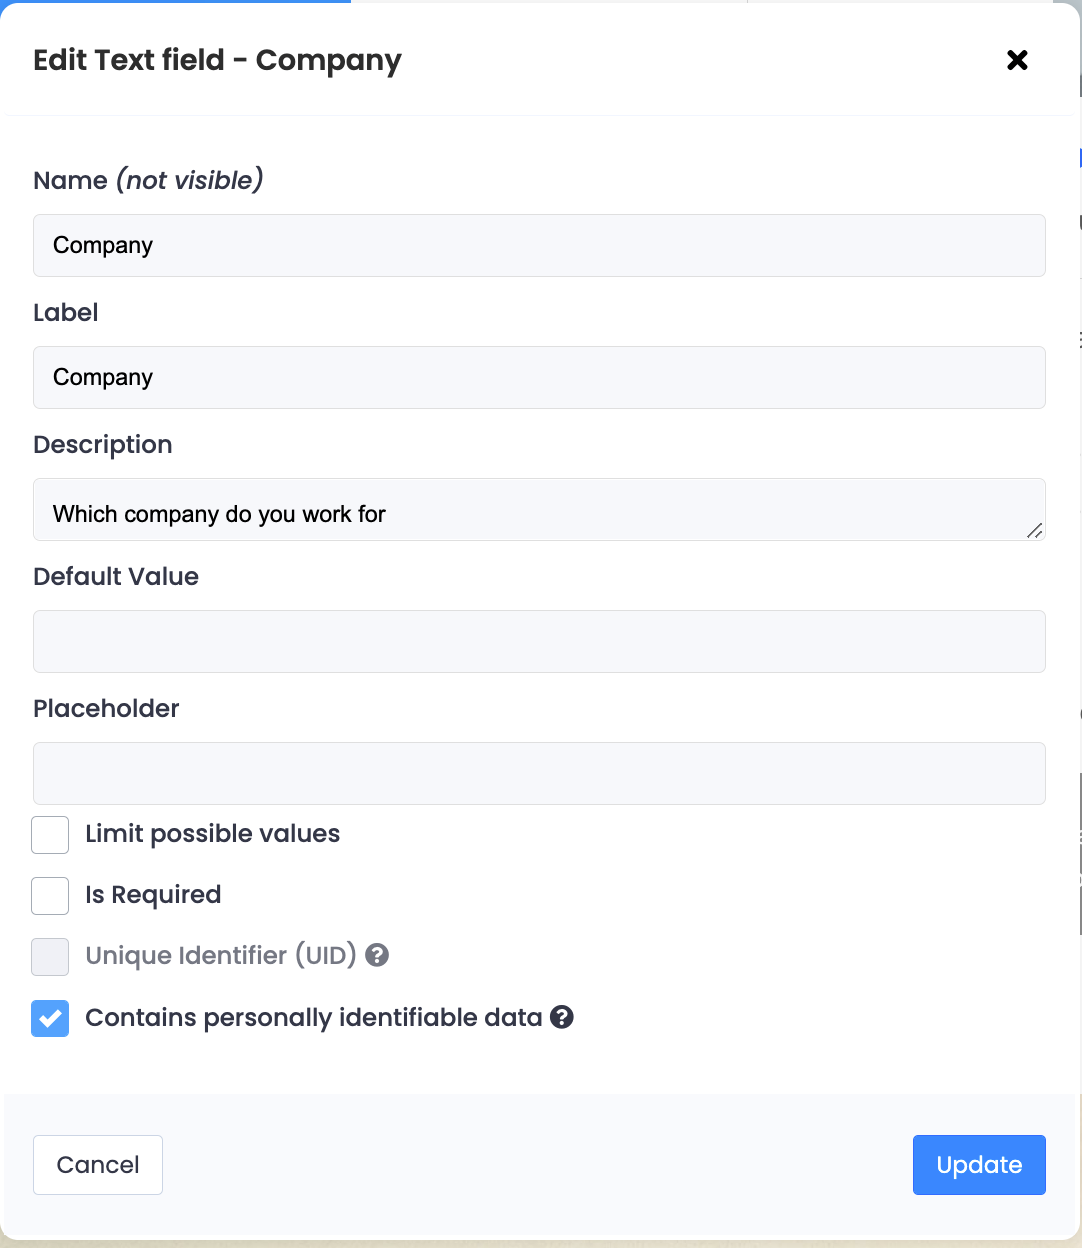
You will then be able to customize the name of your field and other presets.

Once you have created this field, the Placeholder for it will automatically be created and will be added as an option in the 'shortcode' option on your text editors.

You can place these placeholder/shortcodes anywhere in your promotions (including in the automated emails, pop-ups & even in link structures), and provided that the data exists for this field, the variable data will show.
Adding Images as a variable
The ability to show a different image to each person is particularly useful if you are creating Private Promotions and sending people InviteLinks to enter your promotion. With this function, you can not only have the promotion show the person their name, but you could also show an image that is customized for them.
A great example might be a consumer brand creating one promotion to run across a number of different retailers, you could pass in the logo of the retailer/venue when generating InviteLinks for their customers. Of course, you can be more ambitious than just logos, but it's a great way to demonstrate what is possible.
Here are the steps to create a variable image
-
First, create a new custom field in your entry form. In our example, we created a 'text' field and named it 'Image-1'.
-
In the editor on your promotion, view the source code and add HTML as follows (this code will align the image in the center and limit the width of the image to 300 px)
-
To make an image show, you'll need to pass in an image URL. To do this, your promotion must be set to 'Private' so that entry is only possible by InviteLink. You set this up on the Launch Control page. Even in Draft Mode, you can select Private and then simulate what it will look like to users.
The example below shows a personalized view of the same private promotion (entry via InviteLink only) where the person's name, company, and company logo are customized.

