You can build your own or customize the default data entry forms using the Builder.
Assuming you've already turned data collection on for your promotion, then keep reading. If you haven't done that yet, follow the instructions here.
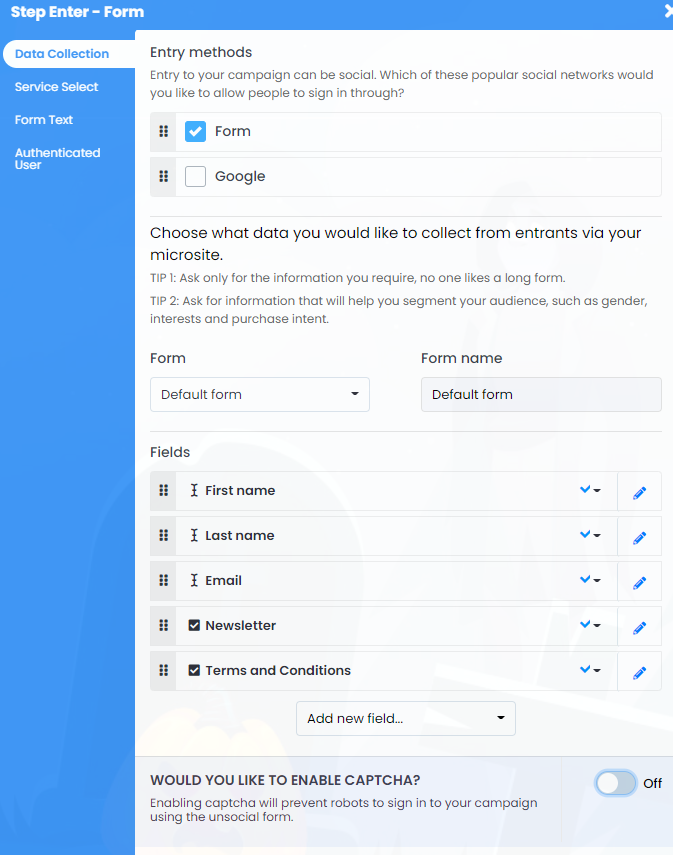
Once you've done that, click on the Enter page and then on the Enter form in the editor, and you should see something like this.
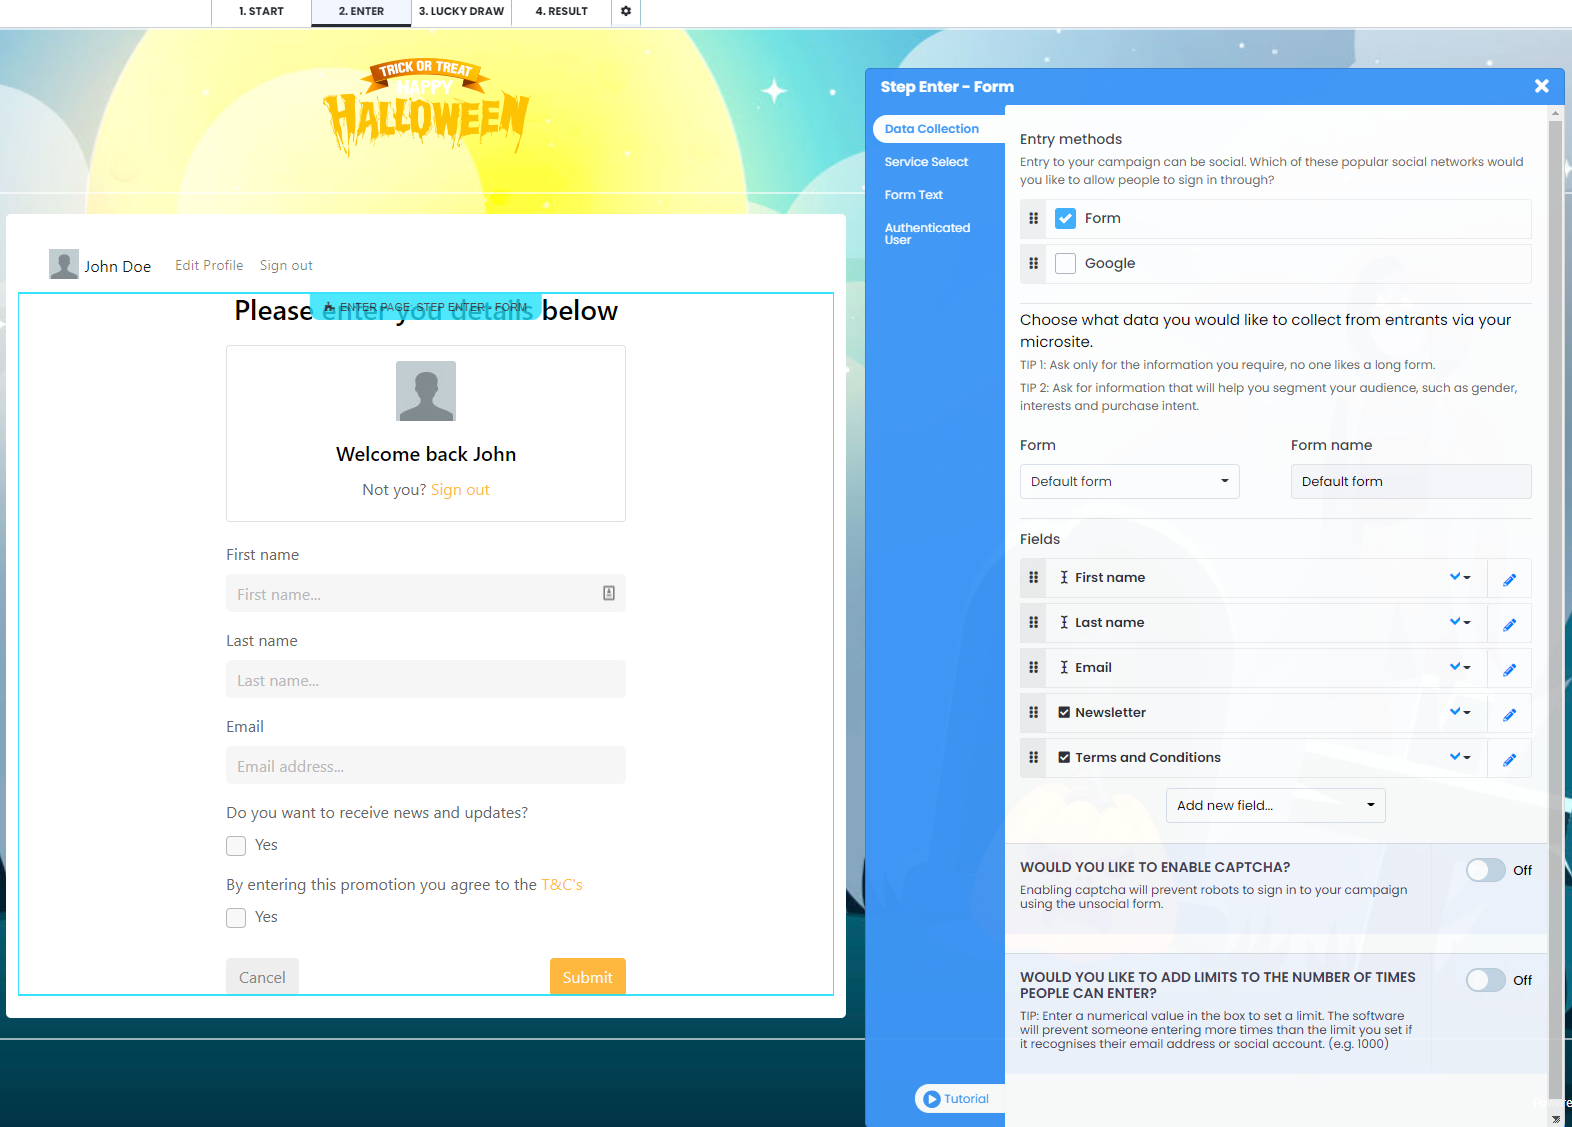
Choose the data and permissions you would like to collect
Pro Tip: If you have previously set up a data entry form on a prior promotion, rather than having to re-configure it again, you can simply select the name of the prior campaign from the drop-down in this list, and your data fields and text will be copied across and applied to this new campaign.

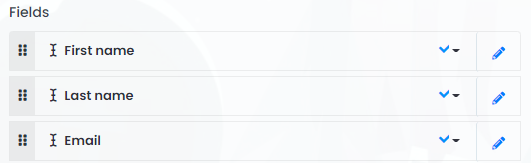
The first name, last name, and email are default fields. You should never change the purpose of these fields, but if you want to edit the text slightly, you can by clicking on the Pencil Icon next to the field.

You can modify the text by clicking the Pencil icon next to each field.
In some of the forms, you will see options such as this.
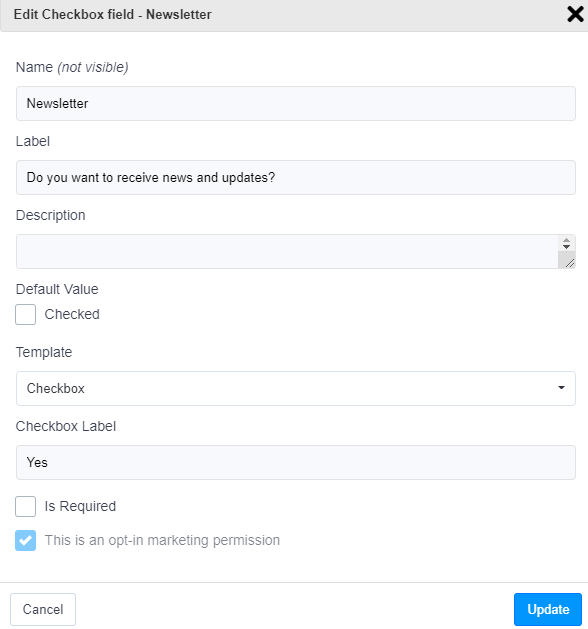
It is important that if you ask people to agree to receive marketing information from you and they are in Europe, you tick the 'contains personally identifiable data' and 'indicated an opt-in permission.' This will ensure that any text you have entered as a description for what they agree to will be recorded in the database and available for download as a CSV export.
Configure when a data field will show
Looking at the screenshot below, you will notice that there is a small triangular icon to the left of the pencil.
Click this to show the drop-down options below.
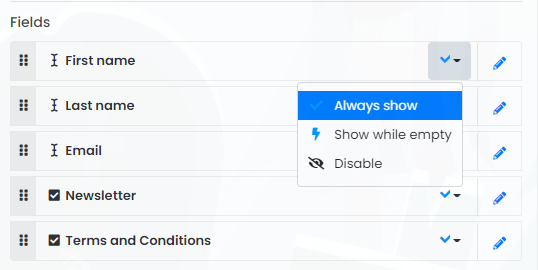
If you select Always Show, then no matter how many times people enter the promotion, they will be asked this question again. However, if you select only Show while empty, then you will only ask each question once.
Terms and Conditions
By default, the Terms and Conditions that are added to every ready-made promotion are set via the Popups menu.
You can read more on this here.
Set the order in your data fields that appear on your form
If you'd like to change the order in your data fields that appear on the Entry form, you can easily do that by dragging clicking on this icon and dragging it.


Add your own custom data fields
If you want to collect information such as a telephone number or address, you can add a new field and label it as required.
To do this, click on the Add new field drop-down and select the type of data field you would like to add.
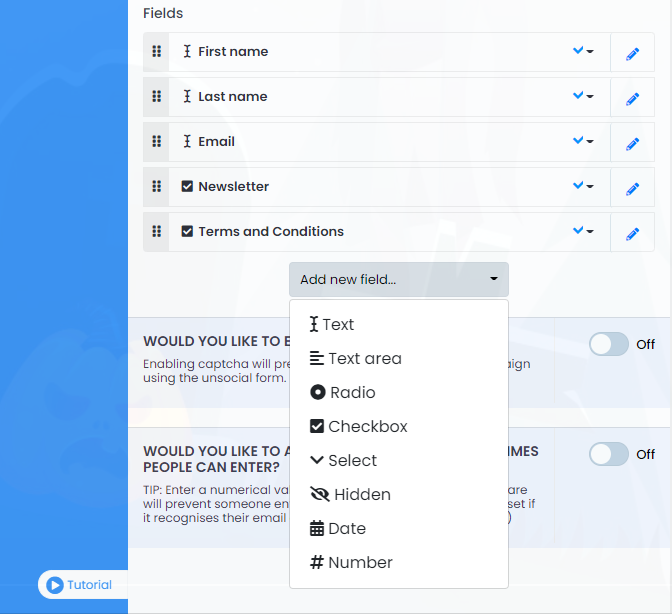
You will then see a screen that, depending on the data type you've selected, will give you various ways to configure how that data field is collected and used.
Asking a skill question
Under certain jurisdictions games of chance, even though free to enter, may fall into a grey area. Under such circumstances you can add a question of skill to your promotion's entry form and set what the acceptable answers are.
Simply add a new 'Text Field' and then select the tick box option 'Limit Possible Values'. You can then enter acceptable answers. People will only be able to proceed if their answer matches one of the acceptable answers.

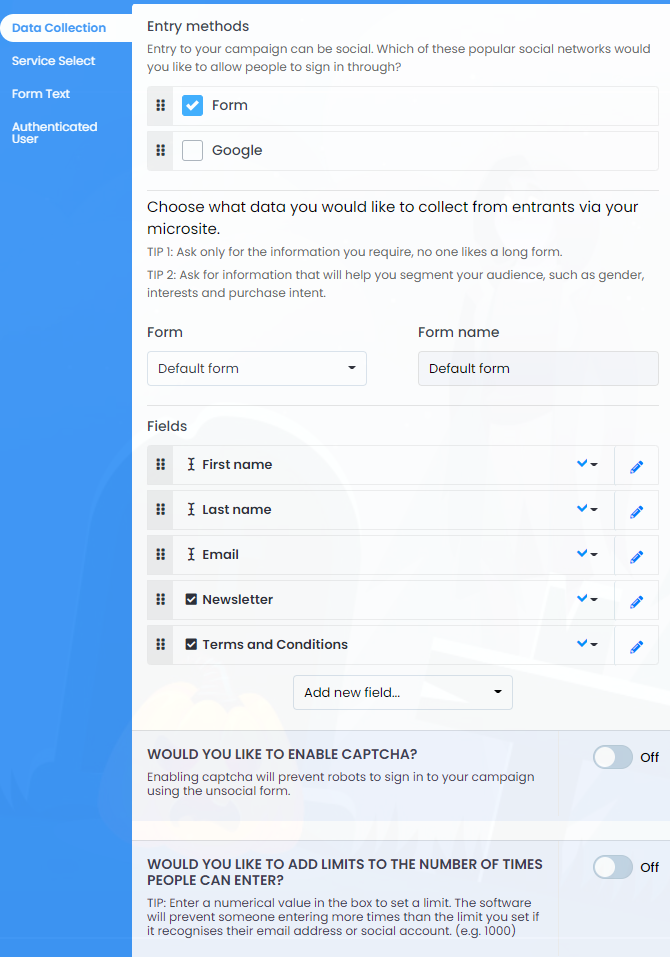
Reduce fraud and help to block robots - Turn On Captcha
If you are offering valuable prizes, it's likely that some people may try to circumvent your login/entry restrictions using robots. You can help prevent this by toggling the On/Off switch on the Enable Captcha selector.
Limit the number of entries into your campaign
If you would like to limit the number of times somebody can enter your promotion, you can easily do this by toggling the On/Off switch on the Add Limits selector, as you can see below.
If you toggle it to On, you will see this.
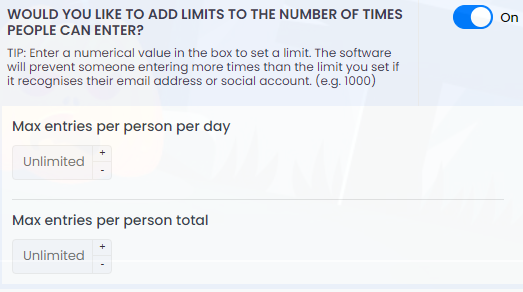
Now select the type of limit you would like.
Pro Tip - It's best only to do this after you have launched your promotion so you can test your promotion without being restricted by the number of times you can enter.
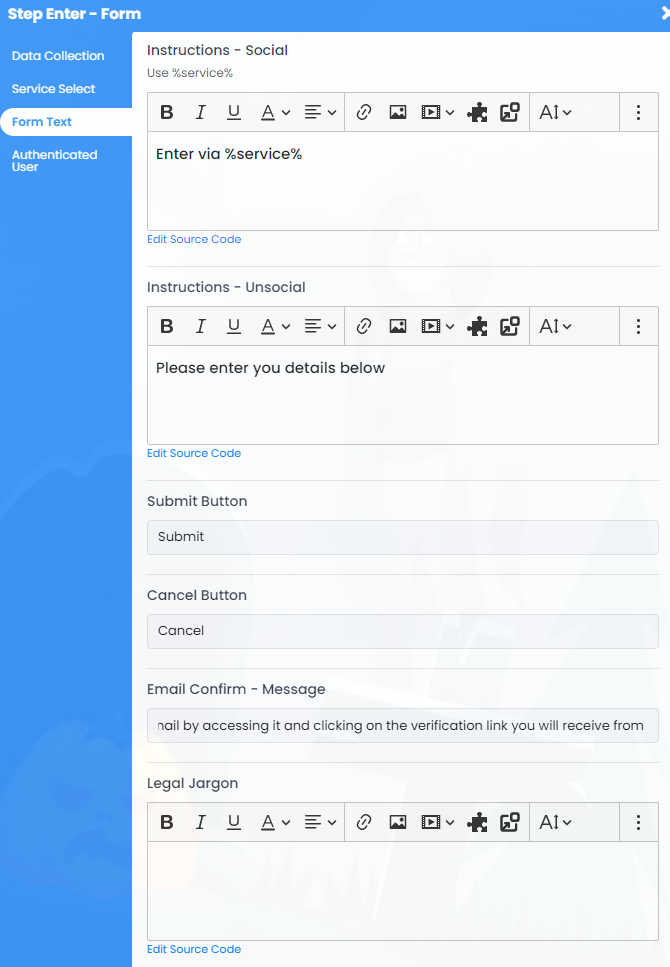
Default Text on the Form
If you want to change the text that's on a button or any of the other default text, you do it in this section.
If you'd like to read more on how to change the default text, click here
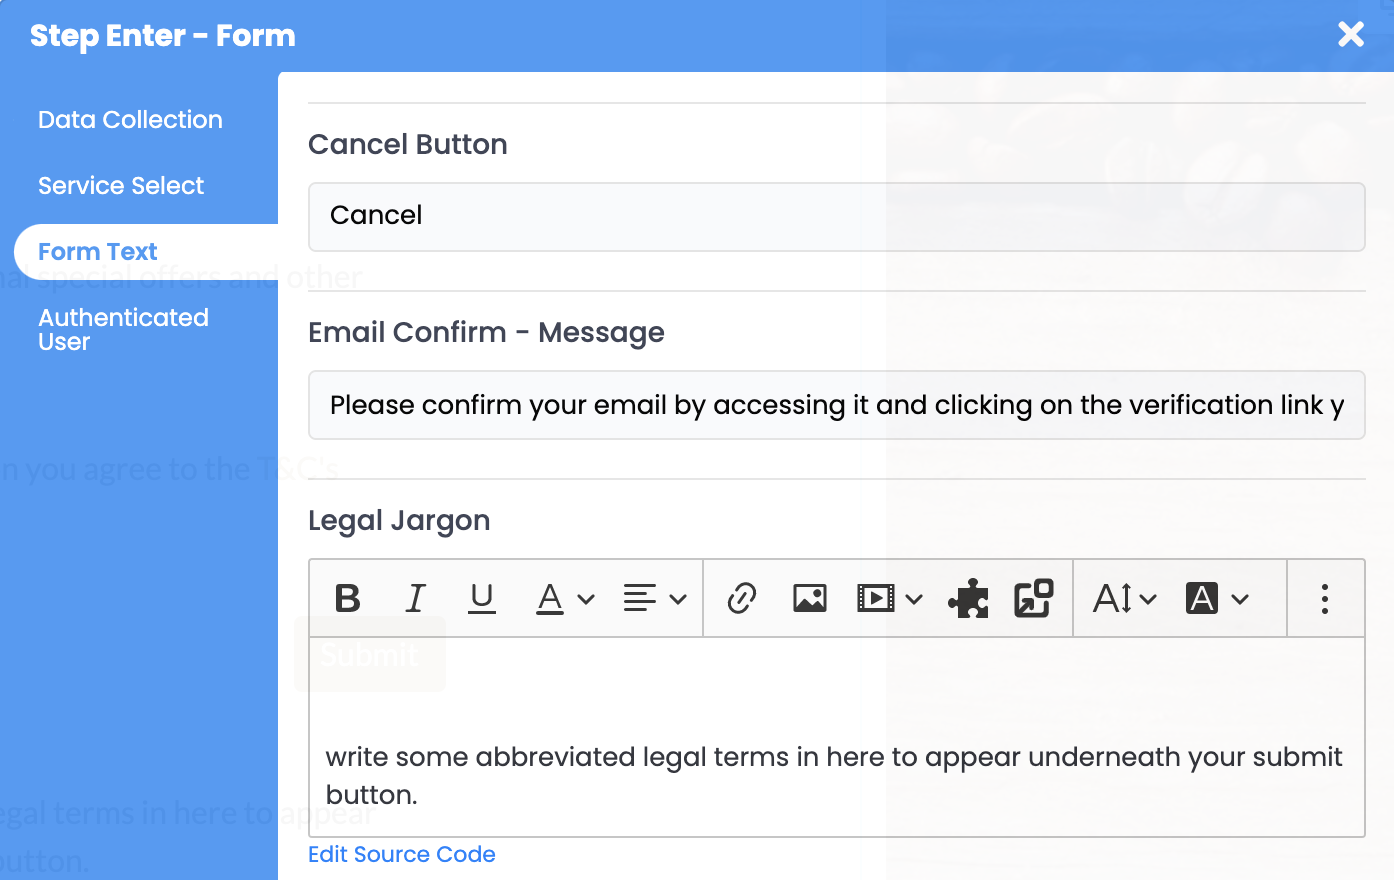
Add any abbreviated terms and conditions.
This is the section where you can add a short paragraph of legal text on the data entry form.
If you'd like to read more on this, click here.