If you have already completed the onboarding, you will already have your first draft promotion. If not, just click below before proceeding with the next steps
Getting started with your first promotion
1. Add your Prize Outcomes
Whether you have a Wheel of Fortune, Scratch and Match, or a Slot Machine promotion, you will more than likely want to give some kind of a prize to some or all your players.
By default all our Ready Made designs come with just 2. A 'Lucky' and an 'Unlucky'. Feel free to re-name them and change as you need. Also, you can add many more possible Outcomes, the maximum is 50 (though on a wheel that might look crazy).
Example:
In the example below, we've set 8 segments on the wheel, this therefore represents 8 possible outcomes for an entrant as to which segment they'll land on when they spin.
(Each game type in BeeLiked has the same concept of Segments. In a Scratch Off we refer to them as Cards and in others as Prize Segments).
Below you will see that there are seven winning segments and one losing segment we labeled Unlucky.

So you've added your prize segments / cards / whatever ;) Now you're probably wondering how to set the probabilities for each because until you do that, these Outcomes all have equal weight when the wheel spins (and card is scratched, slots are spun etc).
2. Limit the number of prizes
If you want to make sure one outcome, or prize, appears more often than another, you will want to toggle this to the on position.
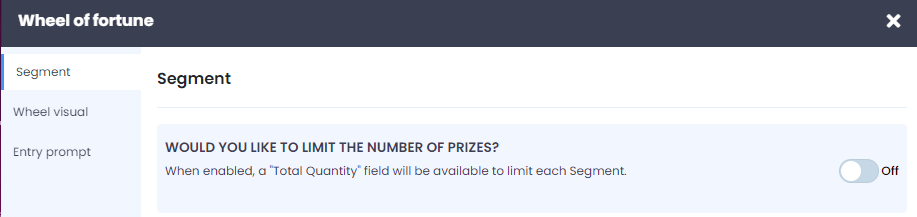
Now if you open the outcome section, you will see a new field you can edit called Total Quantity

Just set this to the Total Quantity to the number of times you would like this particular outcome / prize to appear.
Need a deeper dive on working out the winning and losing probabilities. Here's an article that goes into more detail.
4. Map an outcome to a Result Message
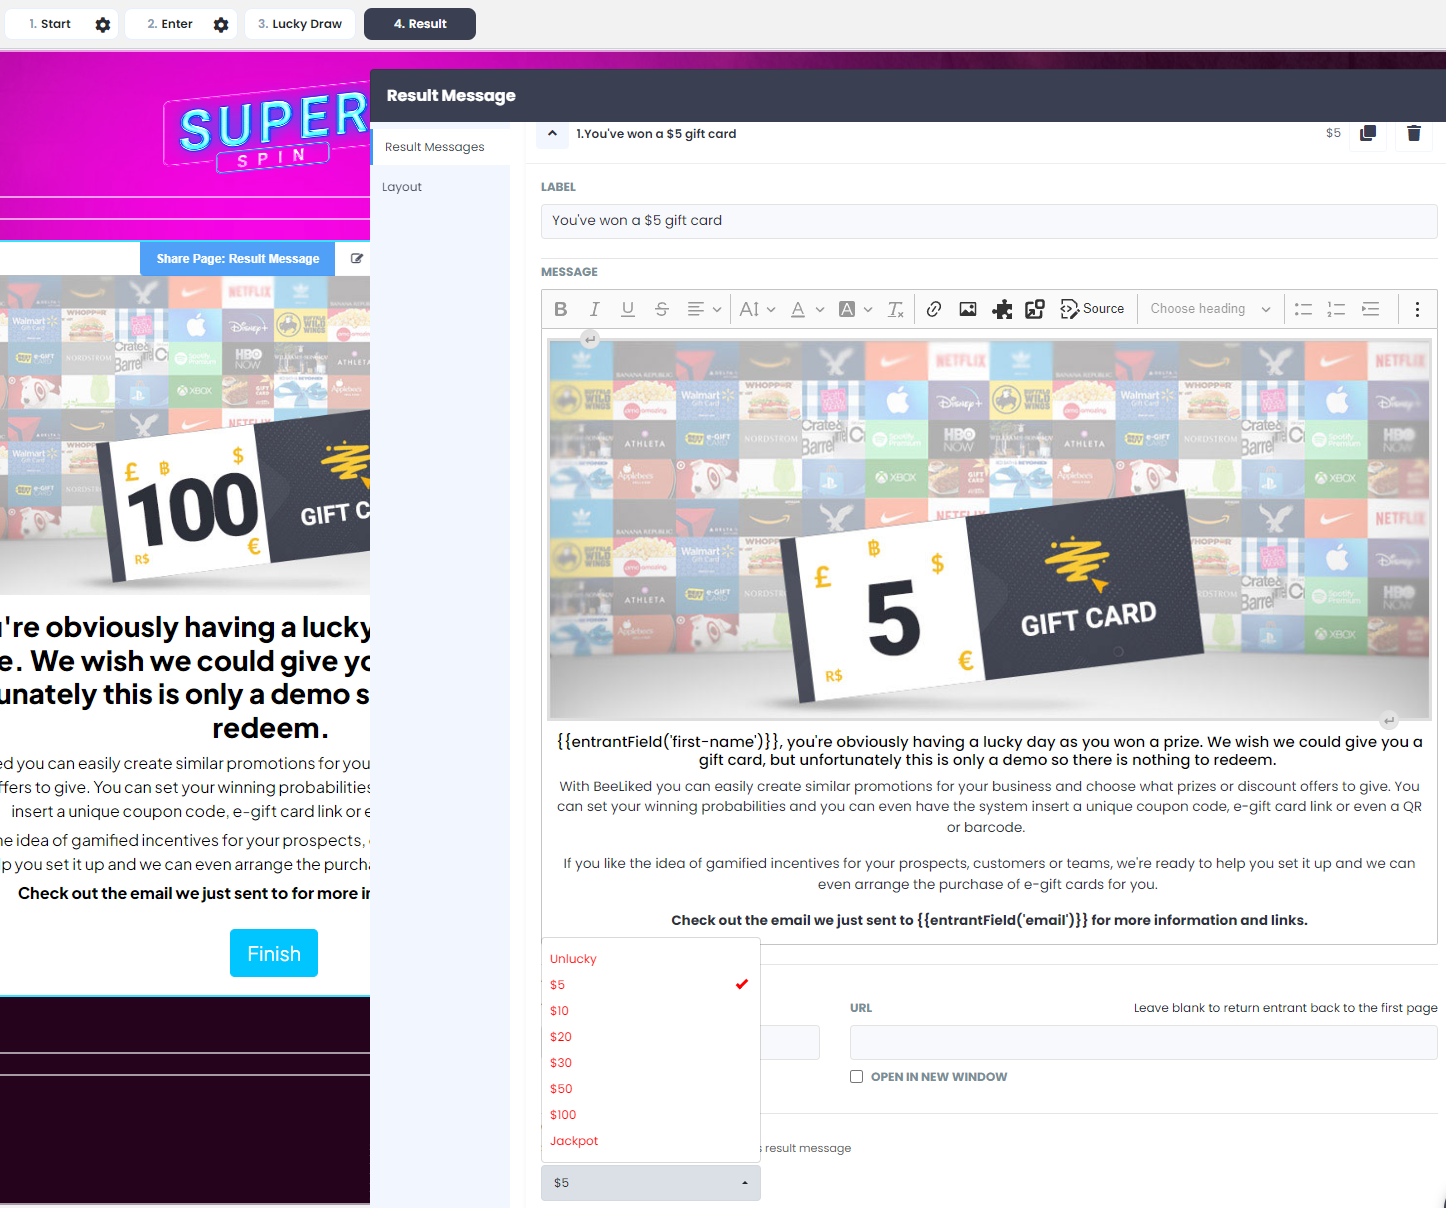
The last step that needs to be done for every promotion is to map your outcomes to a result message. We always recommend that every outcome has its own result message. Using the same example as above, we now have one result message for each outcome

If we open up a result message, you will see that it's mapped to its corresponding outcome or prize. In this case, you can see that the result message has been mapped to the $5 prize. If you wanted to remap it, you would just tick a different outcome.
5. Add in an automated coupon code
If you want to automatically issue individual coupons, discount codes, vouchers, or any other gift to a winner or entrant, then you'll want to use a coupon collection. This feature is only available on a Standard plan, but you can read more about it below
How to add your own one-use coupon codes, voucher codes, or unique URLs to Outcome Messages
Once you have added at least one collection, your Reward Centre will look something like this
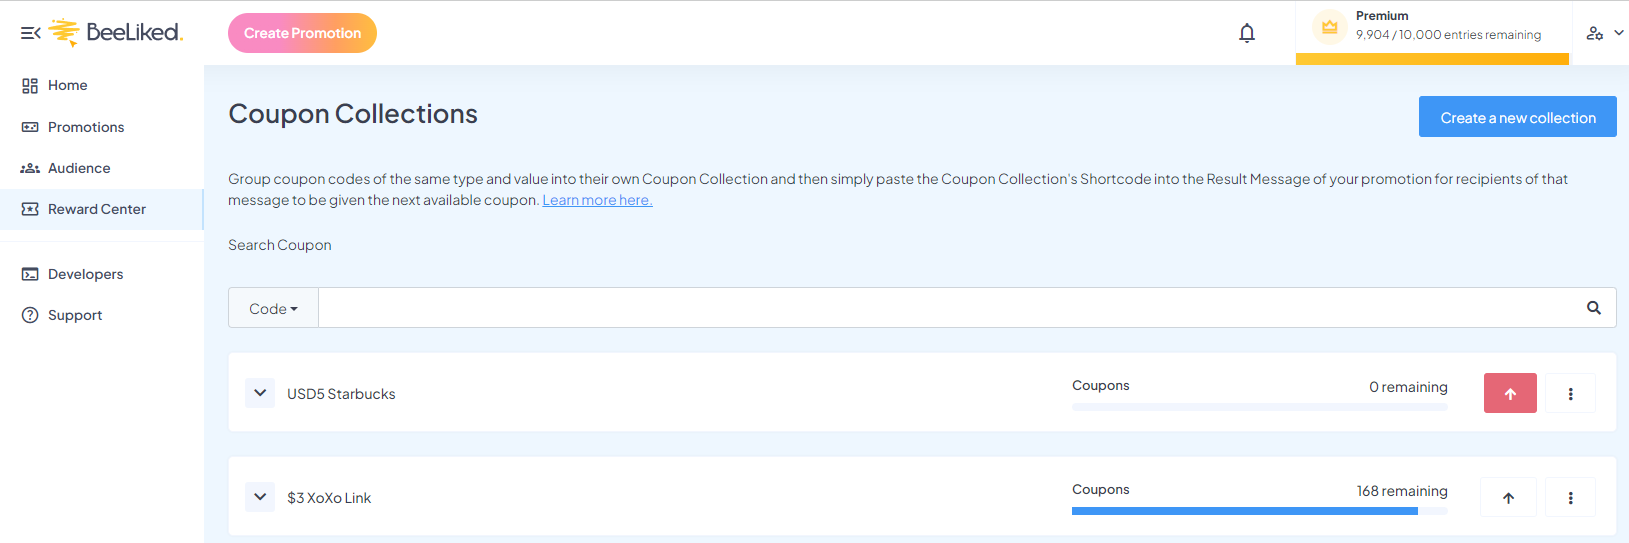
Once you have set up a collection, you can then use these in your result messages to issue individual codes or vouchers to your entrants. You can read more about that below
How to add coupons to a result message
And if you get stuck, most sections have a helpful tutorial at the top video that will help guide you further.

Now you're ready to Go Live with your promotion
Once you've set up your promotion the way you want it and tested it, you should explore the Launch Control settings. Here you can customize the URL and set if your promotion should be public and accessible to all or private and only accessible to those you invite.

Finally, the team is always on hand to help out; just open the in-app chat support in the bottom right corner